|
Available in Française, Español, Português, Deutsch, Россию,
中文,
日本, and others.
 he Wright
"Kite" was the Wright brothers first aeronautical experiment.
Actually, it wasn't a kite at all but a small glider designed to test a
revolutionary new method of controlling an airplane. Early in the summer of
1899, Wilbur Wright had discovered that he could twist or "warp" the
wings of a biplane by drawing the "corners" (where the struts joined
the wings) together with cables. When the wings twisted, the angles of attack
(the angles at which the wings meet the wind) changed – one end of each
wing would be angled up, producing more lift, while the opposite ends were
angled down, producing less. This would cause the biplane to roll. This
is what history remembers as the aileron principle, and it was the first
step toward creating an effective aerodynamic control system for an airplane. he Wright
"Kite" was the Wright brothers first aeronautical experiment.
Actually, it wasn't a kite at all but a small glider designed to test a
revolutionary new method of controlling an airplane. Early in the summer of
1899, Wilbur Wright had discovered that he could twist or "warp" the
wings of a biplane by drawing the "corners" (where the struts joined
the wings) together with cables. When the wings twisted, the angles of attack
(the angles at which the wings meet the wind) changed – one end of each
wing would be angled up, producing more lift, while the opposite ends were
angled down, producing less. This would cause the biplane to roll. This
is what history remembers as the aileron principle, and it was the first
step toward creating an effective aerodynamic control system for an airplane.
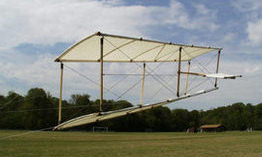
In all probability, Wilbur built several model gliders before he
arrived at a design that performed as he later reported. It's likely that he
used the
Chanute-Herring Glider design as his jumping-off point, and the deep camber
(1:12) of the wings would have made the tethered glider uncontrollable. Our own
experiments show that the wings would have fluttered in the wind, snapping up
and down like a Venetian blind gone mad. Wilbur must have learned through trial
and error that the shallower the camber, the better the tethered glider behaves.
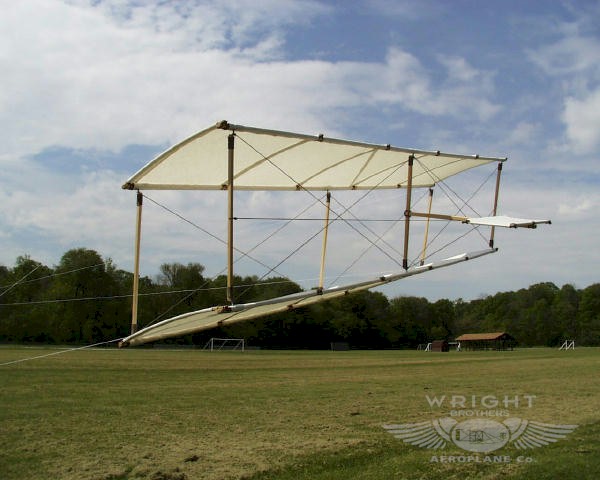
Because it was one in a series of models, it was no
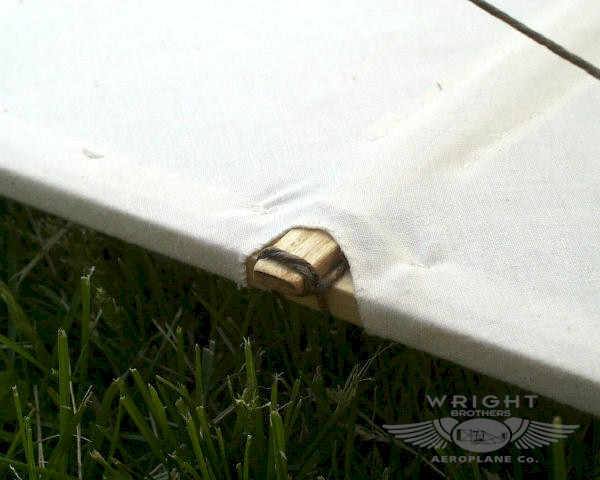
doubt a simple structure, just a frame with cloth stretched over it.
He probably lashed the frame together with linen cord; this was the
custom at the time for making light, temporary structures such as
kites. Wilbur reported that he sealed the cloth with shellac to make
it less permeable. Without the shellac, the air pressure on the
bottom surfaces would have bled through the weave to the top,
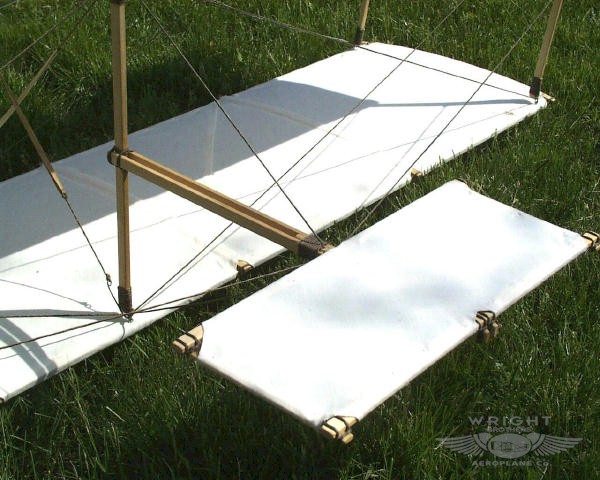
reducing the lift. The most unique feature of the model was the way
the struts were joined to the wings. Because the wings had to be
flexible, Wilbur could not use a rigid joint. The struts had to be
hinged to the wings. At the time, it was common for craftsman to use
two wires or cotter pins hooked together as small hinges. The
performance of our replica shows this would have worked well for
Will's model.
|
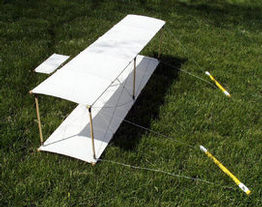
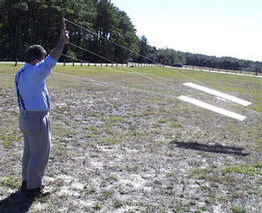
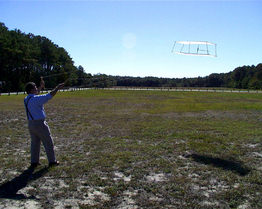
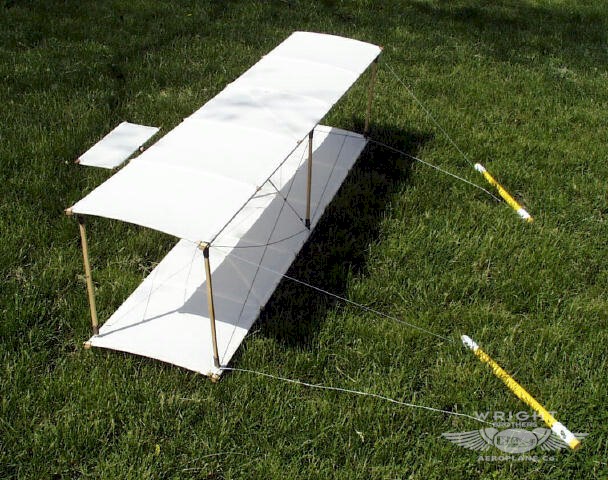
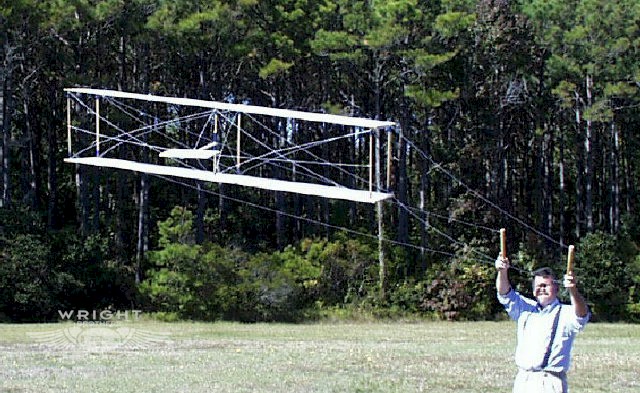
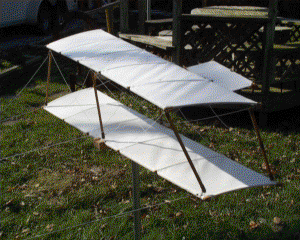
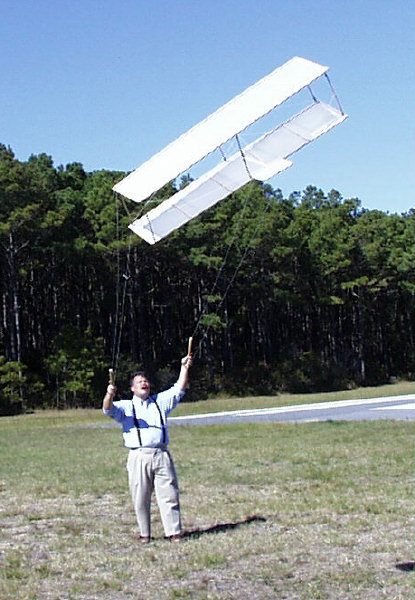
The Wright Kite is what kite flyers call a
"quad" -- four control lines, attached to two sticks. Angle one
stick forward and the other back to warp the wings. |
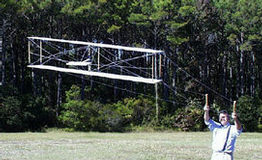
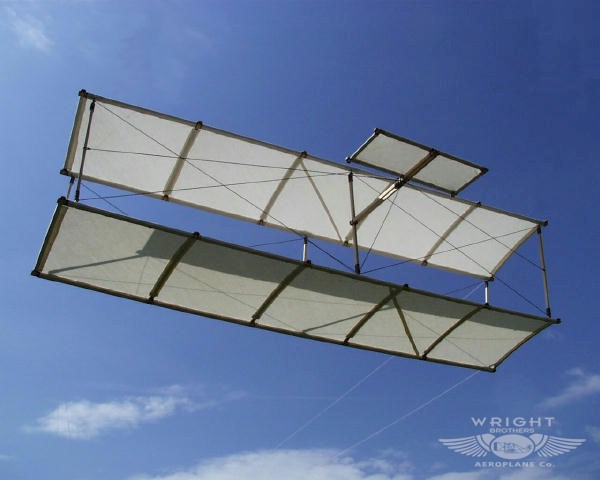
The tail is also movable and functions as an
elevator. Angle both sticks in the same direction to pitch the kite up or
down. For the initial flights, however, you should tighten the bracing
strings so the tail remains stationary. |

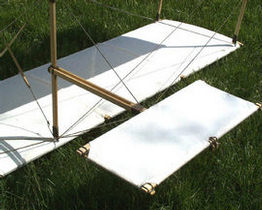
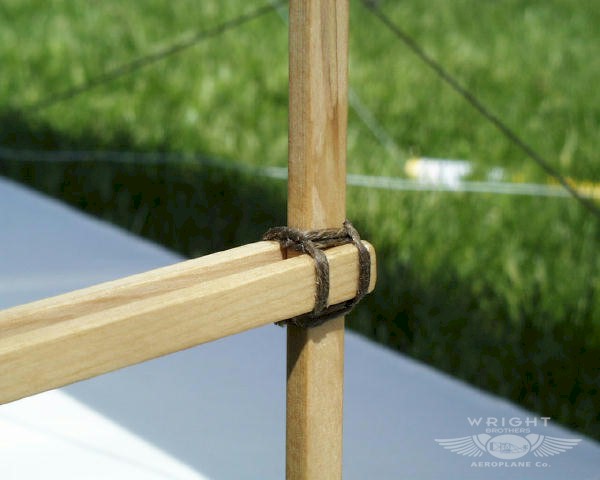
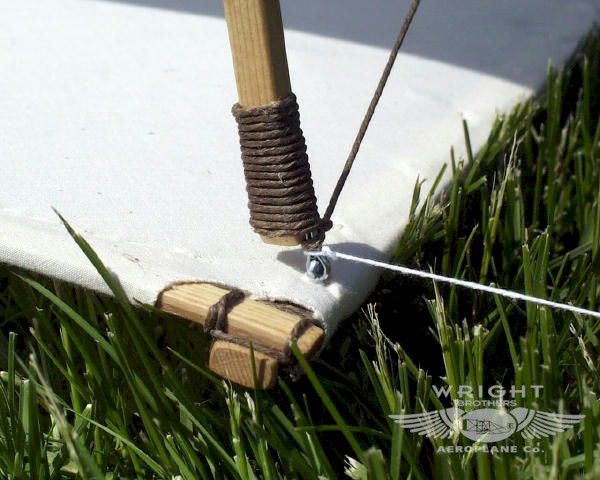
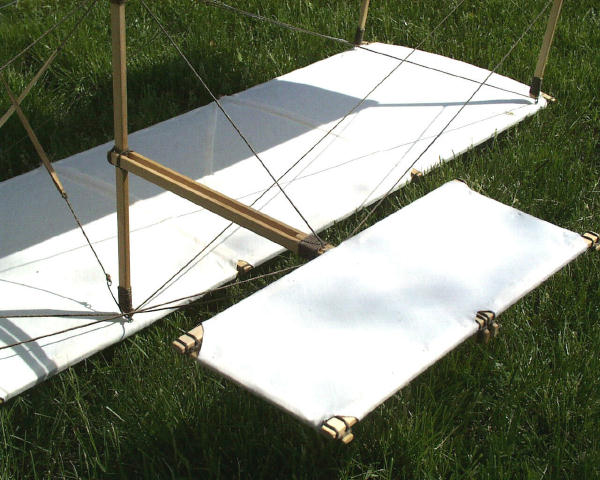
A close-up on the lower right corner of the kite,
showing how the struts are hinged to the spars with cotter pins. The
cotter pins are whip-lashed to the struts and spars. Not only does this
hold the hardware in place, it keeps the wood from splintering. |
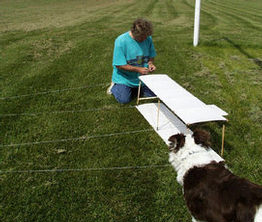
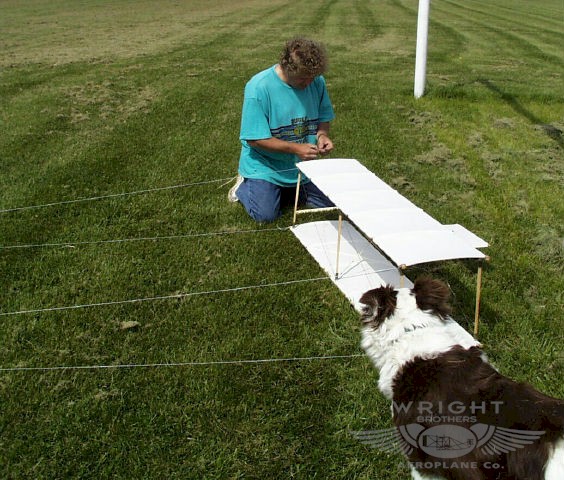
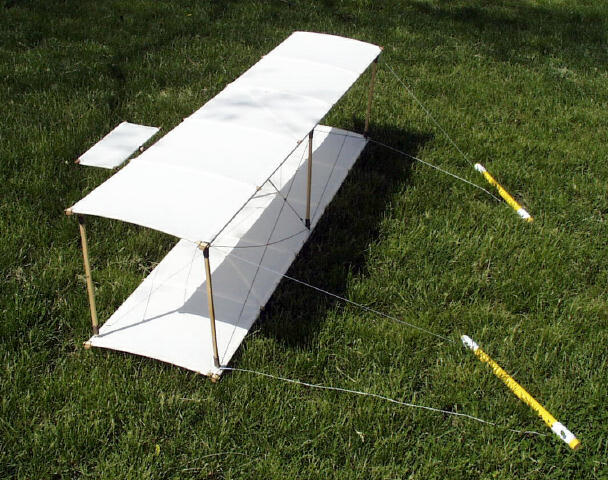
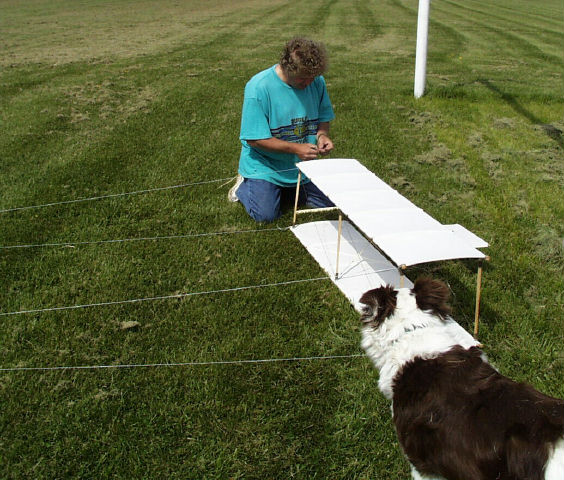
Before you fly the kite, you must make sure that all
four lines are precisely the same length. Keep them short -- no more than
10 feet long. Adjust the bracing strings so the tail is angled up about 5
degrees. |
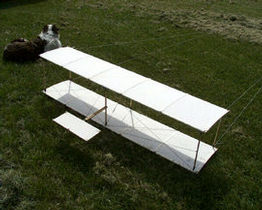
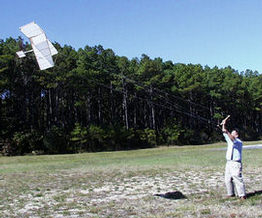
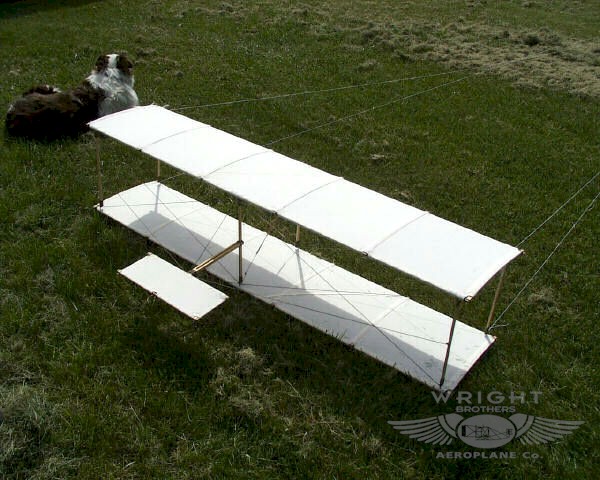
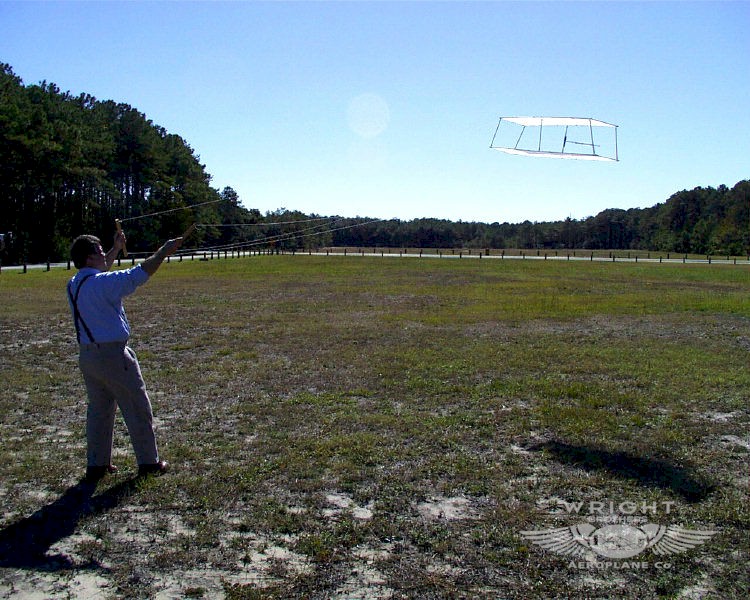
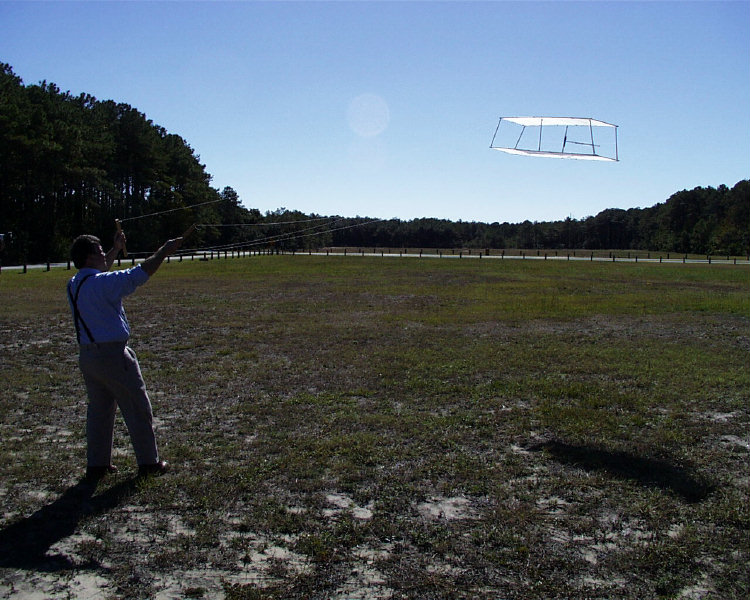
Here's the kite, ready to fly. If the wind is strong
enough, you can launch it from the ground by tugging on the two bottom strings. In lighter winds, have someone hold it up
as high as possible and tug on the bottom strings. |
If the wind is steady, the kite will lift off just
like an airplane. Don't try to run with the kite -- it doesn't work. The
first few moments of flight are very squirrelly. You have only a few
seconds to get control. |
If you have trouble launching and getting control of
the kite, try shortening the strings. The longer the strings, the longer
the delay between your control movements and the time the kite actually
responds. |
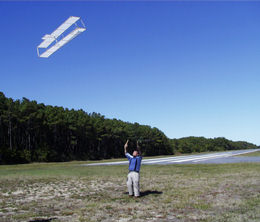
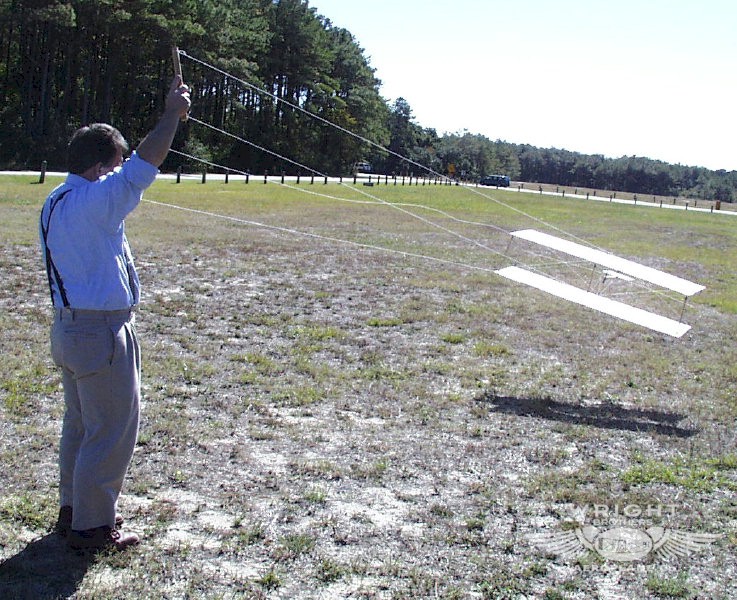
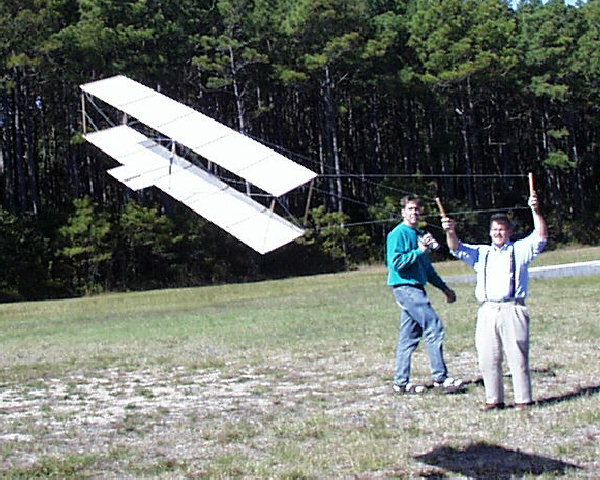
Here's how to roll the kite -- angle the control
sticks in opposite directions, Normally, you shouldn't have to angle them
this far. With a little practice, you can perform slow, gentle rolls. |
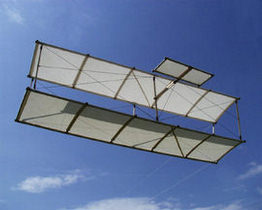
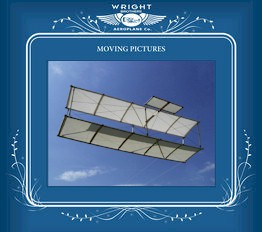
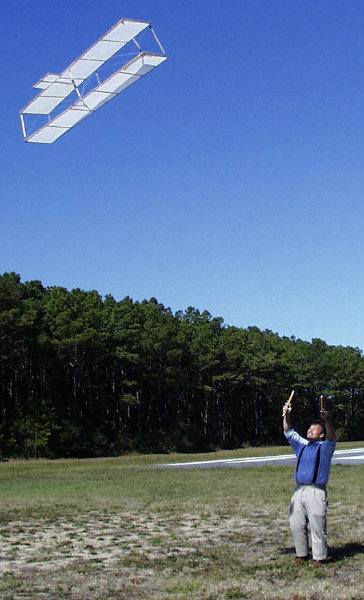
However, the kite will rarely stay still in the sky as it did for this one
photo. It requires constant attention and control inputs from you to keep
it from crashing. |
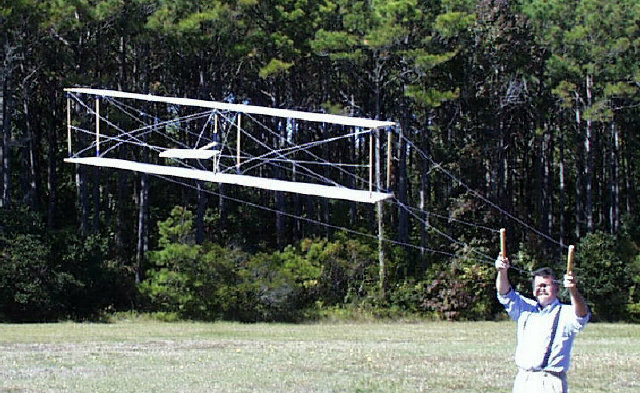
Once you're confident that you can roll the kite,
loosen the bracing strings so there's some play in them and you can rock
the wings back and forth by angling the control sticks in the same
direction. As the wings rock, the tail will go up or down. This, in turn,
will cause the kite to climb or descend. |
When you get the hang of this, you can fly the kite
low to the ground...
|
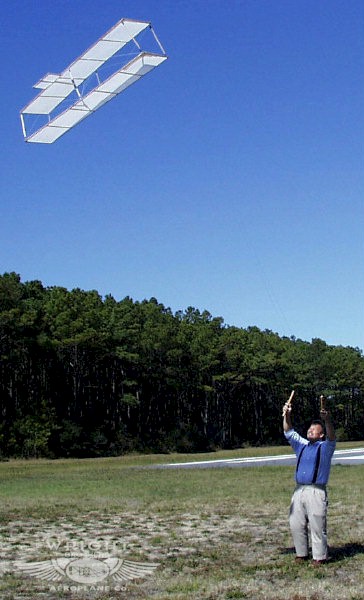
...or high in the air.
|

